Gunman Contracts Story Contracts: Launch Mission Structure
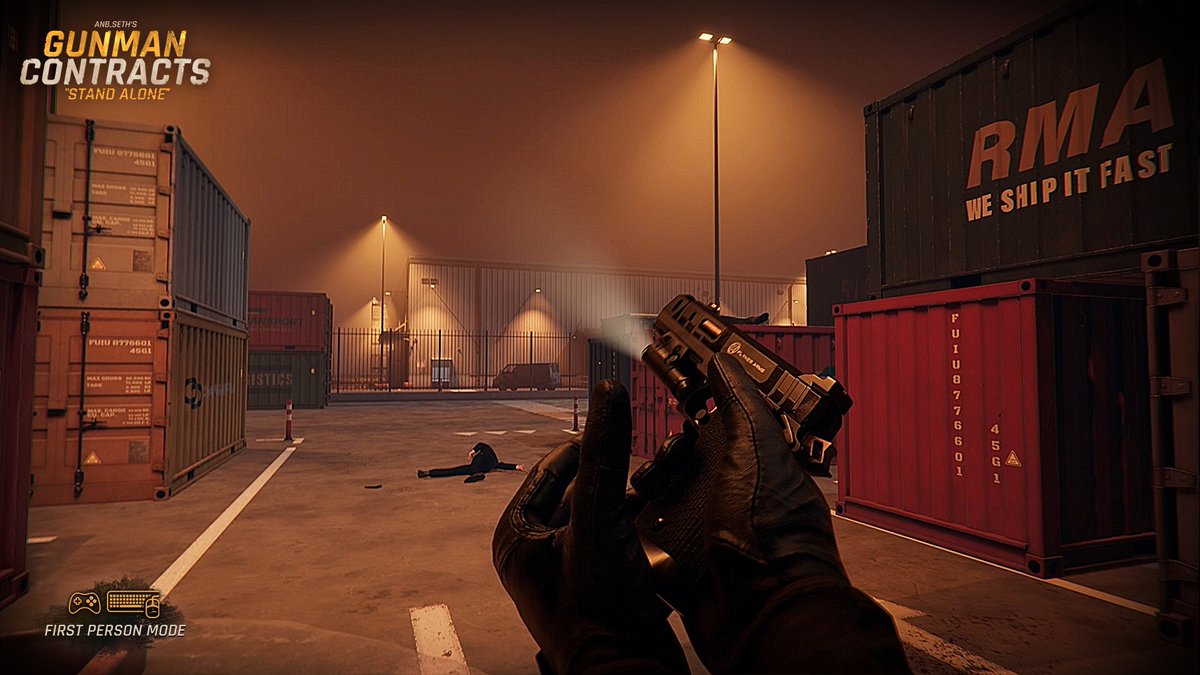
The three connected launch contracts
The current Steam page describes this campaign progression:
- A safehouse outside the city
- A syndicate-run harbor warehouse district
- A mobster restaurant with a dark underbelly
A recent community post relaying a developer update calls the new opening contract “The Outpost,” placed before the Warehouse. Until the released mission menu confirms the final naming, this guide uses the locations shown on Steam.
The publisher gives the clearest official objective description for The Warehouse: infiltrate a human-trafficking operation, eliminate its leader and free captives before they are transported. It also says intelligence places more than 100 personnel on the wider site. That describes the scale and fiction, not a confirmed room-by-room enemy count.
What each location suggests for your first run
| Contract setting | Likely player task from official material | Best first-run priority |
|---|---|---|
| Safehouse / opening location | Establish the Collectors story and core interactions | Learn how objectives, checkpoints and mission transitions are communicated |
| Harbor warehouse district | Infiltrate, eliminate a leader and rescue captives | Protect the rescue objective and learn safe movement through a large operation |
| Mobster restaurant | Continue the connected story into a hidden lower area | Expect a change from public-facing rooms to tighter or concealed spaces |
The priorities are planning advice. Exact doors, keys, enemy spawns and triggers must come from the live build.
Prepare before launching a contract
Use the Hive to remove basic uncertainty:
- Choose one input mode and keep it for the session.
- Test the exact weapon and attachment setup you intend to use.
- Complete one accuracy drill and one pressure drill.
- Make sure reload, interact and movement controls are automatic enough that you can watch the room.
- Decide whether the first run is reconnaissance or a serious completion attempt.
For a first clear, reliability is more useful than a theoretically faster weapon you have not practiced with.
A first-run route method that avoids spoilers
Use the objective → blocker → safe position → exit loop:
- Read the current objective.
- Identify the immediate blocker: enemy, interaction, locked route or rescue condition.
- Choose a position that lets you solve it without losing every retreat path.
- Before moving on, identify where the game is directing you next.
If you become lost, return to the last confirmed objective interaction rather than searching every prop in the level. A live objective highlight or text update is more useful than an old video showing a keycard in a similar-looking room.
How to handle rescue pressure in the Warehouse
The publisher confirms that captives must be freed before transport. A rescue objective changes how you evaluate a firefight:
- Identify whether enemies are blocking access, threatening captives or only delaying your route.
- Avoid committing to a position with no path back to the objective.
- Reload and check surroundings before beginning a long interaction.
- After freeing a captive, verify whether the objective text changes before leaving the area.
- Do not assume Alyx-mod escort behavior, checkpoint rules or failure triggers carry over.
These principles help without pretending the unreleased route is known.
Separate exploration from leaderboard attempts
Every contract has a Steam leaderboard split between VR and non-VR. Your first successful run should answer route questions; later runs can optimize.
Reconnaissance run
- Read every objective update.
- Note major route branches and one safe fallback position per encounter.
- Learn which interactions are required.
- Observe checkpoint behavior after progress.
- Finish even if the time is poor.
Improvement run
- Keep the same input mode and loadout.
- Remove one unnecessary detour at a time.
- Reload before the same pressure points.
- Compare against your own previous run before comparing with the leaderboard.
Score run
- Use a route you can complete repeatedly.
- Restart only when the lost time cannot be recovered.
- Compare with the correct VR or non-VR board.
Diagnose why a contract failed
| Failure pattern | Likely category | Best next action |
|---|---|---|
| You die while reloading | Timing/loadout | Practice the reload cycle in the Hive and choose safer reload positions |
| You keep getting lost | Objective reading/route | Record the last objective update and required interaction |
| You miss after turning to a new enemy | Target transition | Use pop-up targets before the next run |
| A rescue objective fails | Priority/interaction | Confirm the live failure condition and protect the interaction window |
| A route works in flat mode but not VR | Input-specific timing | Build separate routes and compare on separate boards |
What not to copy from the old Alyx mods
The original Chapter 1/2 walkthroughs contain keycards, hidden doors, escort sequences and Alyx-specific controls. They are useful examples of the creator’s earlier design language, but Stand Alone is a new Unity game with a new campaign.
Do not reuse exact key locations, route directions, inventory gestures, checkpoint claims or enemy counts. See mod vs standalone for a complete separation checklist.
A useful contract note template
After a run, record only:
- Mission/version.
- Input mode and loadout.
- Current objective when progress stopped.
- Required interaction or item, if confirmed.
- Checkpoint before and after the blocker.
- Failure condition.
- Safe route or position that worked repeatedly.
That is enough to turn a first clear into a reliable second run without writing down every kill.
Details that may change at release
Final mission names, exact objective chains, checkpoints, difficulty differences, enemy placement, rescue failure rules, hidden routes and extraction triggers are not all listed yet. Follow the live objective text and expect route details to change with patches.